Step-by-Step Guide to Setup Instant Messaging (IM)
This document contains a step-by-step manual on how to install Bopup Communication Server version 5.x and get IM clients connected. The installation of the server does not require any specific knowledge or skills. It is easy to install the server and get it ready and working just after the installation process.
The first part of this document includes the first steps of installing the software and setting up the SQL server database used by Bopup Communication Server.
The second part describes creating user accounts and includes the instructions on how to import user accounts from the Active Directory (LDAP) catalog, create accounts manually via the Add User Account Wizard or permit users to create their own IM accounts directly from messengers.
The last part of this document helps to create an efficient Instant Messaging system within the Organizational Units structure, messaging groups and a scheduled News messaging system.
Installation. SQL Server setup
Run the Setup Wizard to install Bopup Communication Server on a computer that will be used as an IM server.
The welcome page of the Bopup Communication Server Setup Wizard
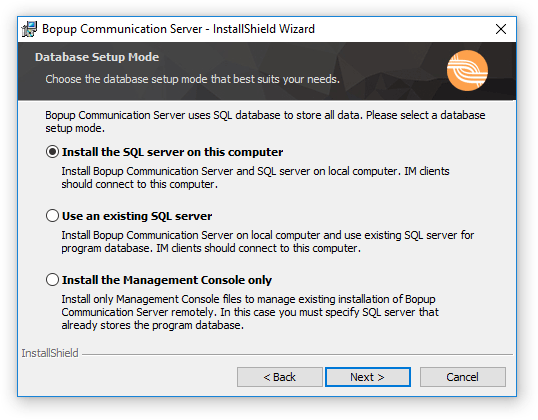
During the installation process, the Setup Wizard asks you about the SQL database setup mode. The SQL Server is used to store the Bopup Communication Server data that includes user account information, user groups, message history, etc.
Select the SQL Server mode to set up a database
If the SQL server is already installed on a local or remote computer, it is recommended to use that SQL server. In that case you need to specify the name of the server, enter Login ID and Password to create a Bopup Communication Server database on the SQL server.
Otherwise choose the option to install the SQL Server locally. In that case the Setup Wizard installs Microsoft SQL Server 2005 Express (or SQL Server 2008 Express depending on setup package) on the local computer.
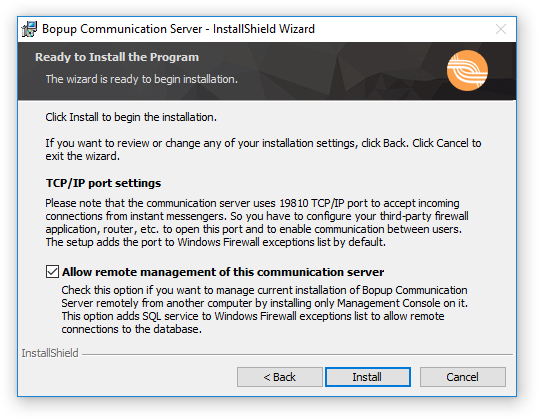
Allowing a management of the IM server remotely.
On the last page of the Setup Wizard you can enable a remote management of Bopup Communication Server. Check the "Allow remote management of this communication server" option to be able to connect and control this instance of the communication server from another computer. This option just adds an SQL service to Windows Firewall exceptions list.
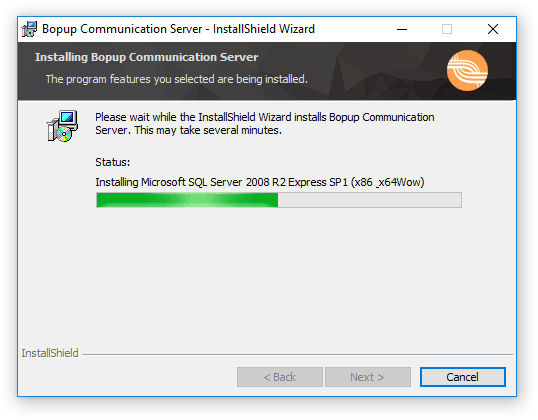
Setup is copying program files and is creating SQL database
After the Setup Wizard finishes its work, Bopup Communication Server is ready to be used and it can accept messenger connections.
Setting up user accounts. Authentication mode
After you install Bopup Communication Server, you need to set up the options related to creating user accounts and authentication mode. Since each user should have his or her own IM account on the server to be able to connect to it, you should first specify the account creation options and/or create user accounts on the server. An IM account has the same name as the Windows login ID the user log on to a computer with.
Double-click the Management Console shortcut placed by the Setup Wizard on the Desktop (or run the shortcut from the Bopup Communication Folder in the Start menu). The console automatically opens the Startup Wizard on it's first startup to help you to manage and setup the general options. You can also find all the settings from the Options dialog box.
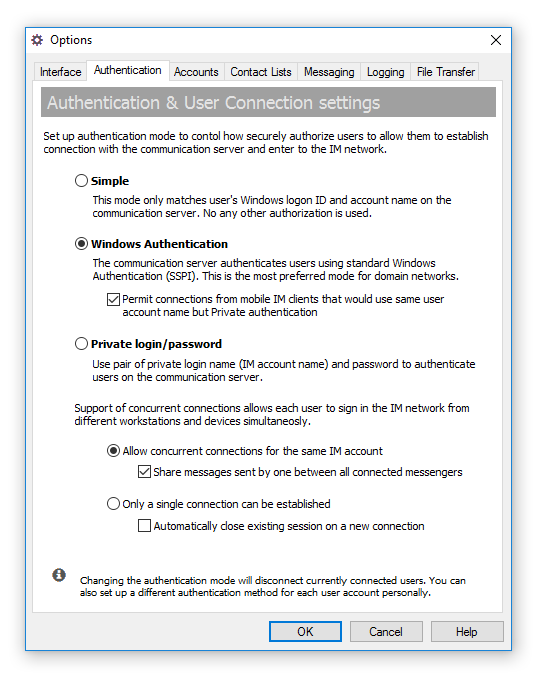
Specify the authentication mode
There are 3 modes available to authenticate users on the IM server: Simple, Windows Authentication and Private login/password pair.
Simple mode only matches user's Windows logon ID and account name on the communication server. No any other authorization is used. For example, all users who logs to Windows with the Administrator name will establish the connection with the communication server with the same IM account name.
In the Windows Authentication mode the communication server authenticates users using standard Windows Authentication (SSPI). This is the most preferred mode for domain networks and it offers more security than the Simple mode.
Private login and password mode offers to use a pair of private login name (IM account name) and password to authenticate users on the communication server. Those login names and passwords are not based on Windows authentication credentials and can be chosen by users, for example, user's e-mail address and his desired secure password.
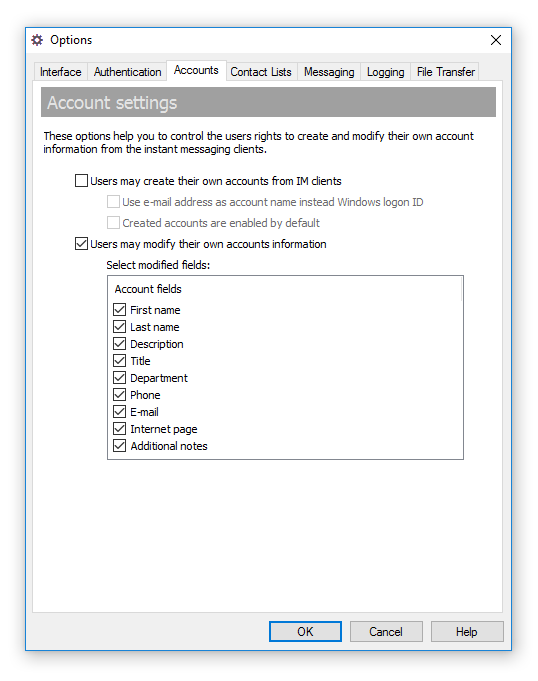
Setting up user accounts. Account options
There are 3 ways to create user accounts on Bopup Communication Server: import accounts from the Active Directory, create each account manually via the Add User Account Wizard or allow users to create their own accounts on the server from IM clients.
Specify the options related to user account management
The following topics describe each of these ways.
Setting up user accounts. Import from the Active Directory
It is easy to create user accounts if your network is based on the Windows Domain structure. You can import accounts from the Active Directory (LDAP) catalog with the help of the Active Directory Import Wizard. Just run the wizard from the Tools menu in the Management Console.
The wizard options allow you to create the same Organizational Units tree in Bopup Communication Server as you have in the Active Directory catalog. Organizational Units are described below in this document.
Setting up user accounts. Create via the account wizard
The Management Console includes tools for managing user accounts on the IM server. To create a new user account, run the Add User Account Wizard.
Setting up user accounts. Create from IM clients
You can permit users to create their own IM accounts from messengers in the server options (described above). When the options allow users to create accounts, the IM client automatically displays the Create My Account Wizard when establishing a connection and allows the user to enter his own account information, such as the first and last names, title, department, contact details that are visible to other users. After the wizard finishes its work, the IM account is created on the server. When the option "Created accounts are enabled by default" is enabled, a new user automatically logs into the IM network.
Use the "Use email address as account name instead Windows logon ID" check box to enable email mode authentication. This mode permit users to enter their email addresses in the Create My Account Wizard in the messengers and use the emails as IM account names. Use this mode to avoid situations when several users have the same Windows logon name (for example, "Administrator") and you want to set up different IM account for each user.
Since anyone who connects to the IM server can create his own account and log into the instant messaging network, it is strongly recommended to make sure that your server is not public and no any external connections can be established. For security reasons, disable the "Users may create their own accounts from IM clients" option or use it when you install the instant messaging server on your office network and the server cannot be accessed from outside your LAN.
Otherwise you can disable the "Created accounts are enabled by default" option and users will not be able to log into the IM network until you enable their accounts on the server.
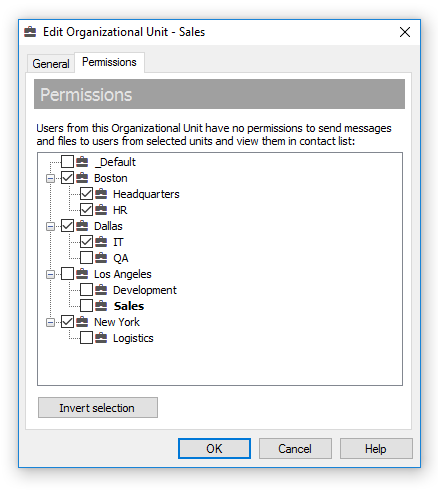
Managing the IM workspace. Organizational Units
Organizational Units constitute the primary way to manage the user's permissions to send messages and files, view other users available on the IM server. You can create the Organizational Units tree by any criteria according to your corporate infrastructure, such as office locations, departments, user roles or any other particular criteria.
Manage the Organizational Unit permissions that apply to all users from the unit
Manage each unit permissions and place users for the best type. It is an easy and flexible way to control the list of users that is available to users from the same Organizational Unit.
You can easily move users and units from one Organizational Unit to another.
When you move a user, you change his permissions to view other users in the contact list and send messages and files to them because the new unit's permissions are applied to the user. This action also resets the user's Contact List stored on the server and the user receives the corresponding notification in the messaging client.
If you move an Organizational Unit, you change only your IM network structure visible in the Management Console and no changes are applied to users.
Managing the IM workspace. Messaging Groups
The centralized client/server architecture allows you to manage messaging groups from the IM server. Each user can be assigned to multiple messaging groups at the same time. A group is assigned to the user with the sending permission flag, which means that the user has the right to send messages and files to the group. The list of assigned messaging groups is visible in the messaging client, so the user can simply select a group and send a message or file to it.
Managing the IM workspace. News messages
The news messaging system is designed to create messages that should be automatically sent by the IM server at a certain time. It is easy to notify users and groups about any events that may occur, such as a file server restart, a discussion meeting, etc.
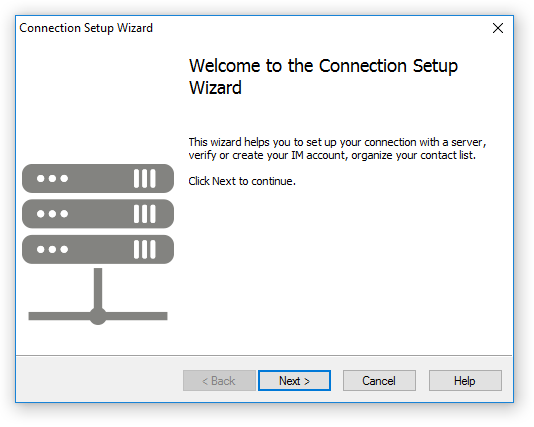
Getting IM clients connected. Set up a connection to the server
To log into the IM network and to be able to communicate with others, the user should specify the name of the computer where Bopup Communication Server is running. The messenger automatically displays the Connection Setup Wizard each time it is started and the IM server is not specified or no connection can be established.
The welcome page of the Connection Setup Wizard (the client-side software)
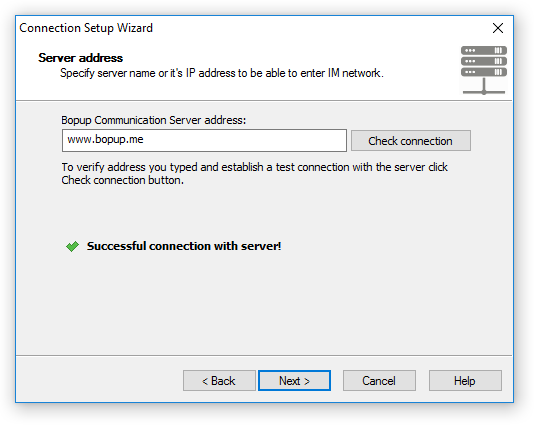
The name of the server can be a simple NetBIOS name (like a computer name) if the client connects from the same local area network, e.g. "imserver". If the connection is established via the Internet, the user should enter the IP address or DNS name of the server. To verify the specified name and establish a test connection to the IM server, click the "Check connection" button.
Specify the name of the IM server (the client-side software)
Getting IM clients connected. Sign up to the IM network
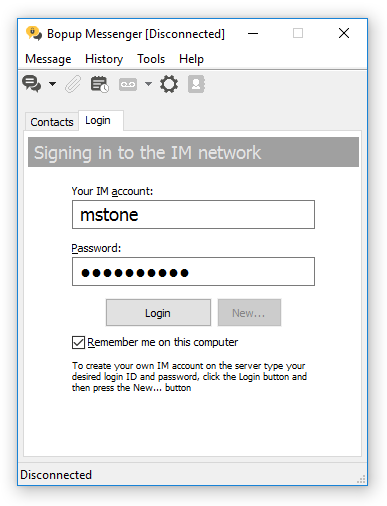
When the Windows Authentication mode is enabled on the communication server the IM clients use current user's Windows Login ID by default as an IM account name to authenticate user. If Windows Authentication fails or the Private login/password authentication mode is enabled, then "Login to the IM network" pane is shown in the instant messaging client to allow users to enter their own IM account name and password to sign in.
Sign in to IM network from Bopup Messenger client
Users can login to the IM network outside a domain network even the Windows Authentication mode is enabled on the server. For successful authentication they must enter their Windows Login ID including domain name, i.e. in the DOMAIN\account format. The messengers automatically resolve and deliver specified domain name on the server that gives users ability to authenticate to the communication server using Windows Authentication outside a domain LAN, for example, from home computers or other locations.